UI Overview
This page walks through the main areas of the IkaSolver interface so you know where to find everything.
Welcome Screen
When you first open IkaSolver (after activation), you see the welcome screen with four buttons:
- New Tree - Create a new game tree from scratch
- Open Tree - Load a previously saved
.treefile - Load Sim - Import a solved strategy from an
.iksfile - Remote - Connect to a remote solver server (expands to show host, port, and token fields)
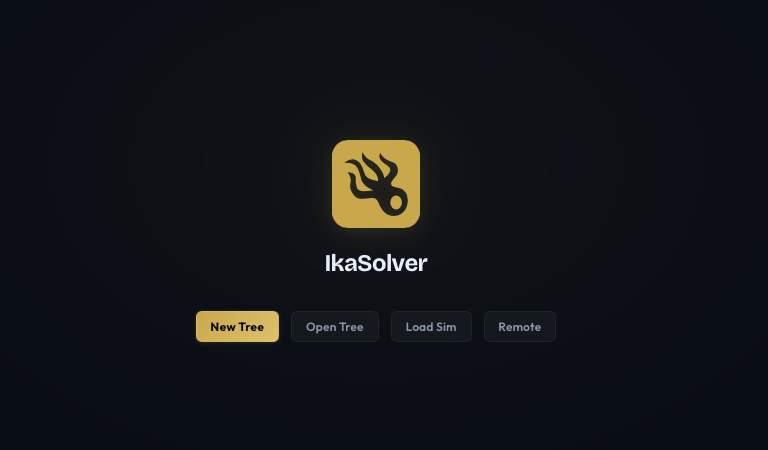
Once you create or open a tree, the welcome screen is replaced by the main workspace.
Main Workspace Layout
The workspace is divided into several areas:
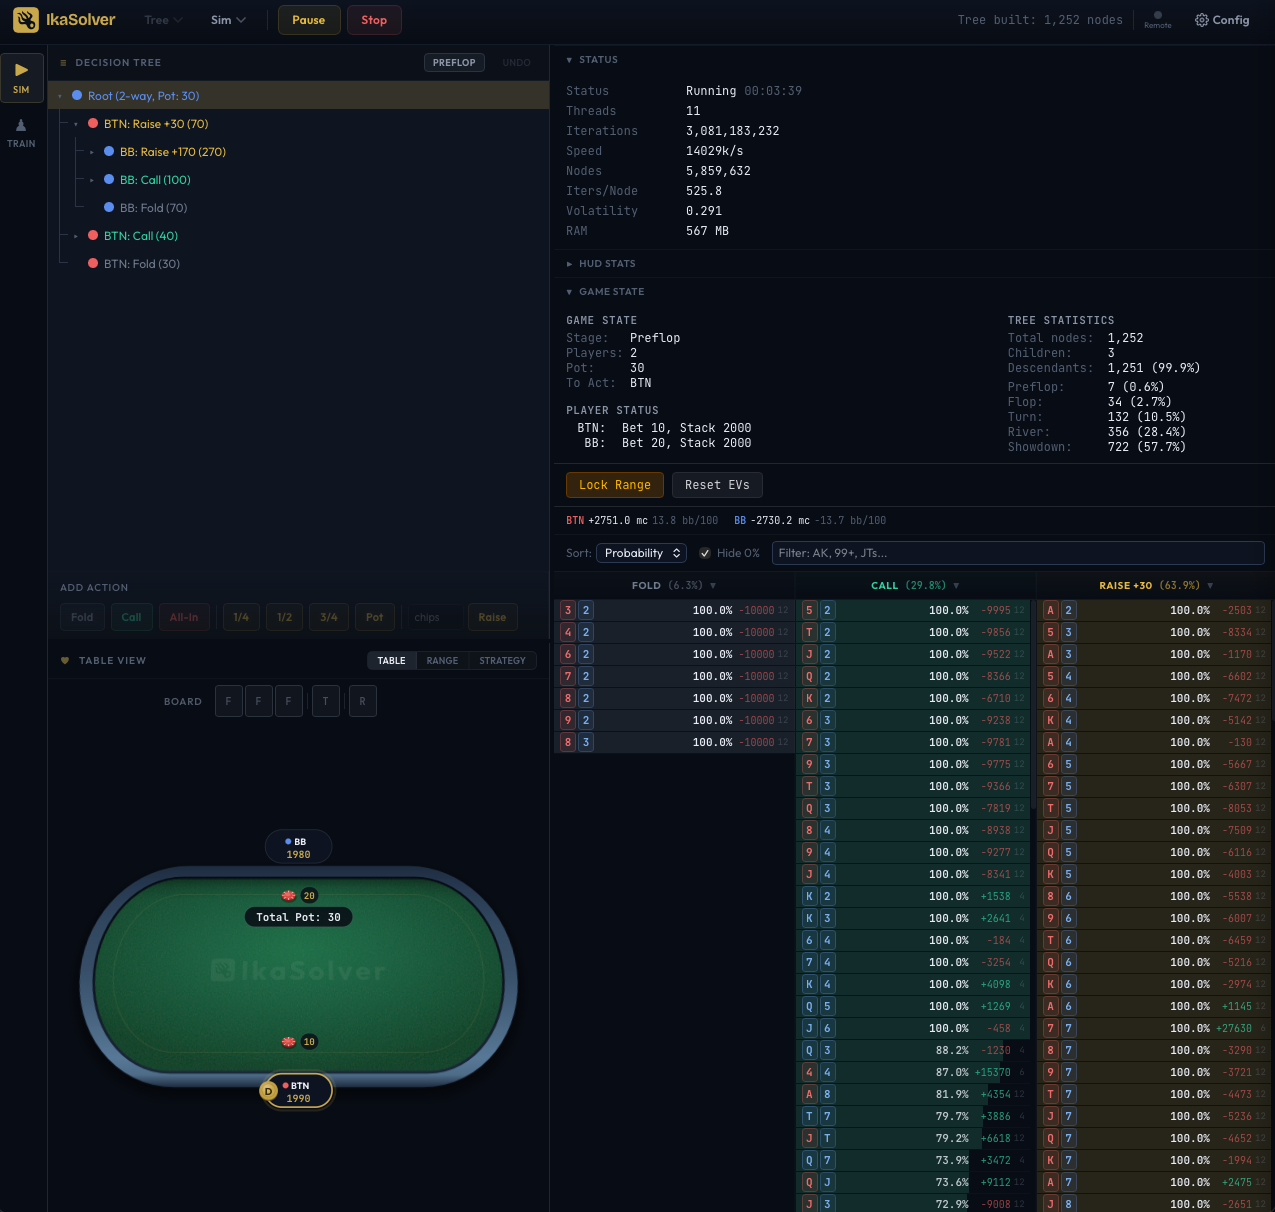
Toolbar (Top)
The toolbar runs along the top of the window and contains:
- IkaSolver logo - always visible
- Tree menu - New Tree, Open Tree, Save Tree, Build Tree
- Sim menu - Load Sim, Save Sim (with street picker), PIO Export
- Solver controls - Run, Pause, Resume, Stop buttons
- Ranges button - opens the Starting Ranges editor (postflop trees only)
- Optimise sizes - checkbox to auto-simplify the tree (preflop trees only)
- Bounty dropdown - configure bounty settings (only when bounty mode is active)
- Status text - shows the last action or status message (right side)
- Remote indicator - green dot when connected to a remote solver
- Config button - opens the Settings drawer

SIM Tab vs TRAIN Tab
A vertical tab bar on the far left lets you switch between two modes:
- Sim - the main workspace for building trees, running solves, and analyzing results
- Train - a GTO trainer that quizzes you on the solved strategy (available only after a solve completes)
Left Panel: Decision Tree + Table/Range/Strategy
The left side is split into an upper and lower panel, separated by a resizable divider.
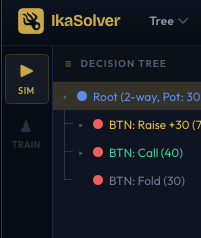
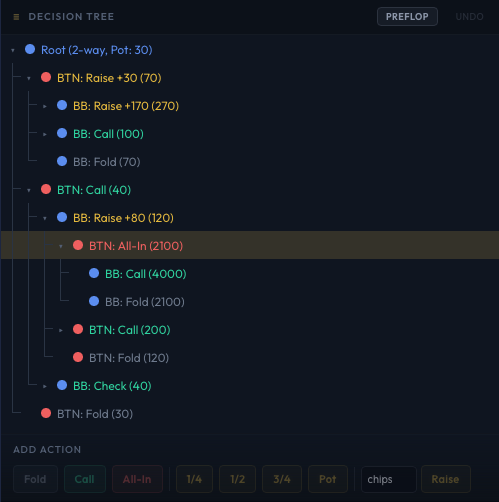
Upper left: Decision Tree
A hierarchical view of the game tree. Each row shows a decision node: the acting player, the action taken, and the resulting pot size. You can:
- Click a node to select it (updates all other panels)
- Click the expand arrow to see child nodes
- Right-click for a context menu (Edit Bet Size, Delete Node, Add to All, Lock Range)
- Use the Undo button in the header to reverse tree edits
Below the tree is the Add Action bar, where you can add new actions (Fold, Call, All-In, pot fractions, or a custom chip amount) to the selected node.
Lower left: Table / Range / Strategy
Three sub-tabs switch between different views:
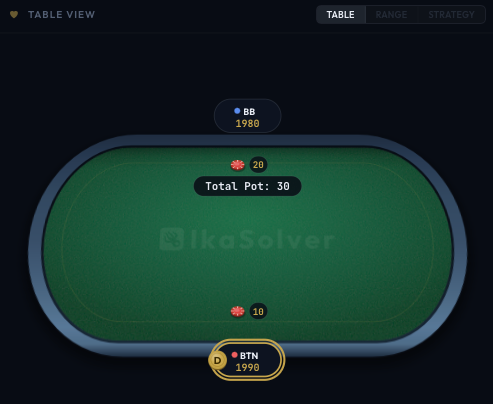
- Table - A visual poker table showing positions, stack sizes, and the current pot. Click a player to select their range.
- Range - A 13x13 hand grid showing the selected player's range, color-coded by action frequency.
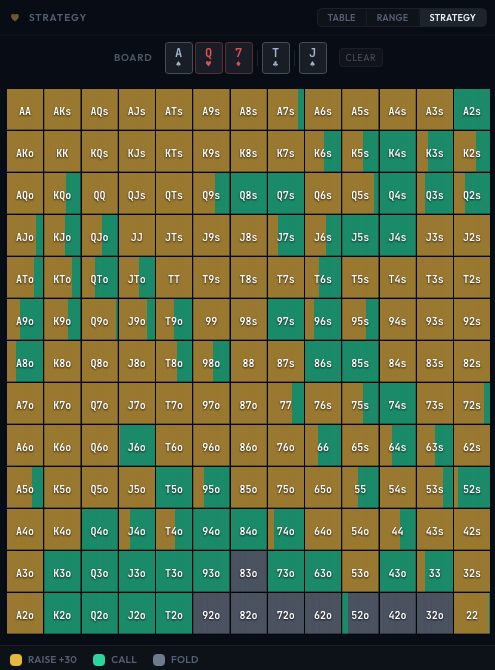
- Strategy - A 13x13 grid where each cell's color shows the action mix for that hand (e.g., red = fold, green = call, gold = raise).
For postflop trees, a Board Card Picker appears above these views where you select the community cards.
Right Panel: Solve Panel
The right side contains the solver output:
- Status (collapsible) - Iterations, speed, volatility, player EVs, memory usage, elapsed time
- HUD Stats (collapsible) - Aggregate statistics like VPIP, PFR, 3-bet percentage for each position
- Game State (collapsible) - Details about the currently selected node (pot, stacks, bets)
- Hand Frequency Table - The main results area showing every hand combo, its action frequencies, combo count, and EV

Settings Drawer
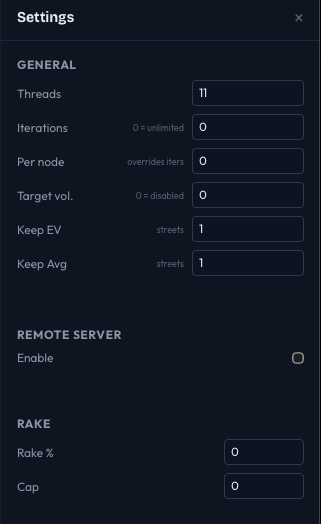
Click the Config button (gear icon) in the toolbar to open the Settings drawer, which slides in from the right. It contains:
- General - Threads, iterations limit, per-node iterations, target volatility, keep EV/avg streets
- Remote Server - Enable/disable remote solving, connection settings
- Rake - Rake percentage and cap
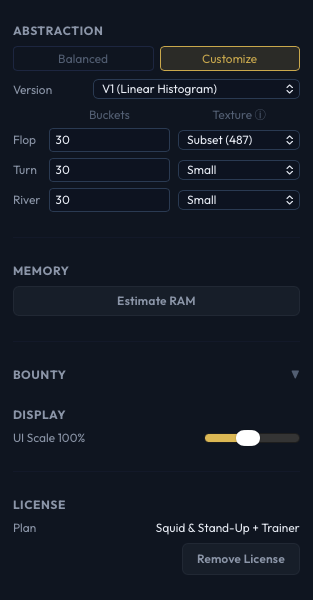
- Abstraction - Balanced mode or custom bucket/texture settings per street
- Memory - Estimate RAM usage before solving
- Bounty - Win impact EV display (when bounty mode is active)
- Display - UI scale slider
- License - Current plan and Remove License button
Keyboard Shortcuts
| Shortcut | Action |
|---|---|
Cmd+N / Ctrl+N | New Tree |
Cmd+O / Ctrl+O | Open Tree |
Cmd+S / Ctrl+S | Save Tree |
Cmd+B / Ctrl+B | Build Tree (open Tree Configuration) |
Ctrl+Z / Cmd+Z | Undo last tree edit |
Escape | Close the current dialog or drawer |
Enter | Confirm the current dialog |
How Selection Flows
Selecting a node in the decision tree updates everything else:
- The Table View updates to show the game state at that node (pot, stacks, who is acting).
- The Hand Frequency Table shows the strategy for the acting player at that node.
- The Range and Strategy views reflect the selected node.
- The Game State section shows detailed node information.
This lets you drill into any spot in the game tree and immediately see the solver's recommended strategy.
Next Steps
- Quick Start - Run your first solve
- Creating a Tree - Detailed guide to the New Tree dialog
- Editing the Tree - Add and remove actions after building